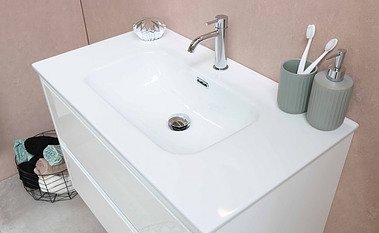
Whether it’s your bathoom hand wash sink or kitchen sink, a blocked sink can be a massive inconvenience. Luckily, sinks are among the easiest of blocked drains to clear.
A lot of blocked sinks are caused by things like:
- Fat & Grease
- Food Waste
- Hair
- Scale (or mineral) build up
- Soap Residue
- Small objects- such as cotton buds or small toys
Much like a toilet, sinks start off with a U bend, or “trap” that is usually the first place to start. After this, the pipe usually travels the shortest distance to the nearest main waste pipe. Usually if it is a hand wash basin, it will connect to the main 4″ waste pipe that the toilet flows to.
Kitchen sinks quite often discharge into a gully to take the waste water to the main drainage underground. There are, of course, variations and the blockage itself (and access) can determine how easy it is to deal with.
Here are Some of the Easiest, Most Cost Effective Ways to Unblock a Sink
If the affected sink is a kitchen sink, then it’s quite likely to be caused by food waste or fat & grease. Not that you’re throwing these things down the sink, of course! It’s more that over time – could be months or years – bits of food scraps or oils and residue from sauces can get lodged and restrict the flow of water through the pipes. Fat and grease tends to coat the entire length of pipe work whilst food can get stuck in specific places.
If the sink is a hand wash basin or bathroom sink, the culprit could be hair caught in the plughole or U bend, or soap residue coating the inside of the U bend or pipe. Sometimes things like cotton buds or other foreign objects can get stuck and then catch other things around it to form a blockage.
Before starting, you will need to empty the sink.
- Clean the U Bend
By removing the U Bend, or trap, you can see straight away the first place where blockages tend to form. Before you ask why we don’t just get rid of these if they “trap” blockages, they prevent bad smells and noxious gases from entering the property from the drainage, so that’s not a good idea.
Once you’ve removed the U Bend, by unscrewing the connections either side, place the parts in a bucket or container and inspect. If any parts are restricted or full, then this is the blockage and can be cleaned.
Make sure you place any seals inside the connections as they were, and check for damage or wear & tear. Seals and pipe parts are easily replacable.
Once put back and tightened, place a clean paper towel or tissue beneath and run the taps. You’ll see almost immediately if the blockage is cleared.
And the paper beneath?
This is a decent way to check for minor leaks. You will notice straight away if there is a major leak if, for example, a seal breaks or you misplace one.
But some leaks can be very slim, and not even cause a drip straight away. After running the taps, whether the blockage is cleared or not, the paper towel will reveal a leak.
Hopefully this is the end of the blockage and you’ve cleared it, if so, great.
If not, let’s move on to the next section:
- Clean the Pipe
After the U Bend, there are usually several bends to change the direction of the pipe to get it to the main drainage and away from the property. These bends can be places for blockages to hang out, just like the U Bend.
If there are bends under your sink and they have screw connections, rather than glued connections, you can simply disconnect, clean and reconnect, and as before, check the seals for wear & tear and any damage.
If it looks like the bends are not to blame for the blockage, it could be the pipe itself. Also, if the bends are glued, rather than screwed together, you will need to attack this in the same way as you would the pipe itself; this is because you cannot dismantle them in the same way.
There are a couple of options here before resorting to buying specific drainage tools or calling someone out.
You need to reach into the pipe with something firm but flexible, such as a coathanger wire or something similar.
If the above methods have not worked -or you’d rather not get your hands dirty at this point – you could try some slower but still erffective methods:
Unblocking a Sink without Tools or Mess
Some blockages can be cleared relatively easily by using a combination of weight of water, heat and soap.
If it isn’t too vile and you have time to wait it out, simply using hot, soapy water can soften the blockage and the water sat on top of it can put pressure on the mass at the same time.
Fill the sink, either using the hot tap or freshly boiled water from the kettle, and leave.
If it hasn’t shifted by let’s say an hour later, top it up and try plunging if you have a plunger available. If you don’t have access to a plunger of any kind, try quickly plugging and unplugging the plughole – just make sure the water has cooled before putting a hand in there!
If you have no luck with this, feel free to try one of our featured products.
Good Luck and hopefully you’ll avoid the need for expensive tools or contractors!
Related Articles

